All the above questions will have their answers in the below article. Let’s see what are these folders and who manages them? All these folders, their information, their management is handled by a Microsoft utility called Disk Management.
What is Disk Management?
Disk Management is a Microsoft Windows utility that allows the full management of disk-based hardware. It was first introduced in Windows XP and is an extension of the Microsoft Management Console. It enables the users to view and manage disk drives installed in your PCs or laptops like hard disk drives (Internal and External), optical disk drives, flash drives, and partitions associated with them. Disk Management is used to format drives, partition hard drives, assign different names to drives, change a letter of drive and many other tasks related to disk.
What is Disk Management? How to Open Disk Management in Windows 10 Method 1: Open Disk Management Using Control Panel Method 2: Open Disk Management Using Run Dialog Box How to use Disk Management in Windows 10 How To Shrink A Disk Memory using Disk Management Set Up New Hard Disk & Make Partitions In Windows 10 How to change a drive letter using Disk Management How to delete a Drive or Partition in Windows 10
Disk Management is now available in all Windows, i.e. Windows XP, Windows Vista, Windows 7, Windows 8, Windows 10. Although it is available in all Windows operating systems, Disk Management has small differences from one Windows version to another. Unlike other software available in computers with shortcuts to access directly from Desktop or Taskbar or Start Menu, Disk Management does not have any shortcut to access directly from Start Menu or Desktop. This is because it is not the same type of programme as all the other software available on a computer. As its shortcut is not available, it does not mean it takes much time to open it. It takes very less time, i.e. a few minutes at most to open it. Also, it is very easy to open Disk Management. Let’s see how.
How to Open Disk Management in Windows 10
Make sure to create a restore point just in case something goes wrong.
Method 1: Open Disk Management Using Control Panel
To open Disk Management using Control Panel follow below steps:
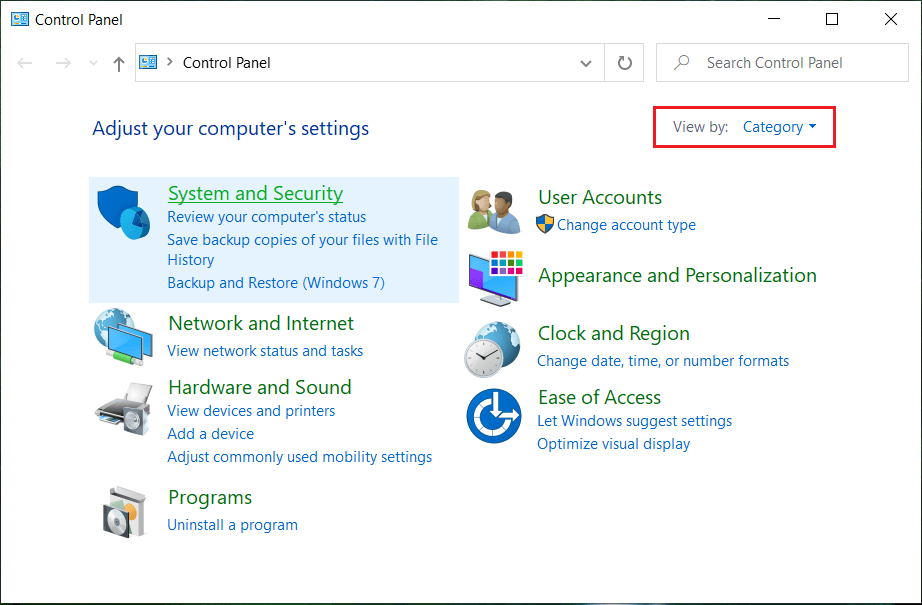
Open Control Panel by searching for it using the Search bar and hit the enter button on Keyboard.
Click on System and Security.
Note: System and Security are found in Windows 10, Windows 8 and Windows 7. For Windows Vista, it will be System and Maintenance, and for Windows XP, it will be Performance and Maintenance. 3. Under System and Security, click on Administrative tools.
Inside Administrative tools, double-click on Computer Management.
Inside Computer Management, click on Storage.
Under Storage, click on Disk Management which is available under left window pane.
Below Disk Management screen will appear.
Note: It may take several seconds or more to load. 8. Now, your Disk Management is open. You can view or manage disk drives from here.
Method 2: Open Disk Management Using Run Dialog Box
This method applies to all versions of Windows and is faster than the previous method. To open Disk Management using Run Dialog Box, follow below steps:
Search for Run (Desktop app) using the search bar and hit Enter on the keyboard.
Type below command in Open field and click OK: diskmgmt.msc
Below Disk Management screen will appear.
Now Disk Management is open, and you can use it for partition, change drive names and manage drives.
How to use Disk Management in Windows 10
How To Shrink A Disk Memory using Disk Management
If you want to shrink any disk, i.e. reduce its memory, then follow the below steps:
Right-click on the disk you want to shrink. For example: Here, Windows(H:) is being shrunk. Initially, its size is 248GB.
Click on Shrink Volume. Below screen will appear.
Enter in MB the amount you want to reduce space in that particular disk and Click on Shrink.
Note: It is warned that you cannot shrink any disk beyond a particular limit. 4. After Shrinking Volume (H:), Disk Management will look like as given below.
Now Volume H will occupy less memory, and some will be marked as unallocated now. Size of disk volume H after shrinking is 185 GB and 65 GB is free memory or unallocated.
Set Up New Hard Disk & Make Partitions In Windows 10
Above image of Disk Management shows what drives and partitions are currently available on the computer. If there is any unallocated space which is not used up, it will mark with black, which means unallocated. If you want to make more partitions follow below steps: 1.Right-click on unallocated memory.
Click on New Simple Volume.
Click on Next.
Enter the new disk size and click on Next.
Note: Enter the disk size between given Maximum space and Minimum space. 5. Assign the letter to new Disk and click Next.
Follow the instructions and click on Next to continue.
Click on Finish.
A new disk volume I with memory 60.55 GB will be now created.
How to change a drive letter using Disk Management
If you want to change a drive name, i.e. want to change its letter then follow below steps:
In the Disk Management, right-click on the drive whose letter you wants to change.
Click on Change Drive Letter and Paths.
Click on Change to change the letter of the drive.
Choose a new letter you want to assign from the drop-down menu and click on Ok.
By performing the above steps, your drive letter will be changed. Initially, which was I now changed to J.
How to delete a Drive or Partition in Windows 10
If you want to delete a particular drive or partition from window, follow the below steps: 1.In the Disk Management, right-click on the drive you want to delete.
Click on Delete Volume.
Below warning box will appear. Click on Yes.
Your drive will be deleted, leaving the space occupied by it as unallocated space.
Recommended:
Right, Click using the Keyboard in Windows Share Your Google Calendar With Someone Else Hide Your Facebook Friend List from Everyone Fix Can’t Turn ON Windows Defender
I hope this article was helpful and you can now easily Use Disk Management in Windows 10 to shrink a disk, set up new hard, change drive letter, delete a partition, etc. but if you still have any questions regarding this tutorial then feel free to ask them in the comment’s section.